Active Directory Federation Service (ADFS) Configuration
Part 1: SmartRecruiters Configuration
-
Login to your SmartRecruiters account.
-
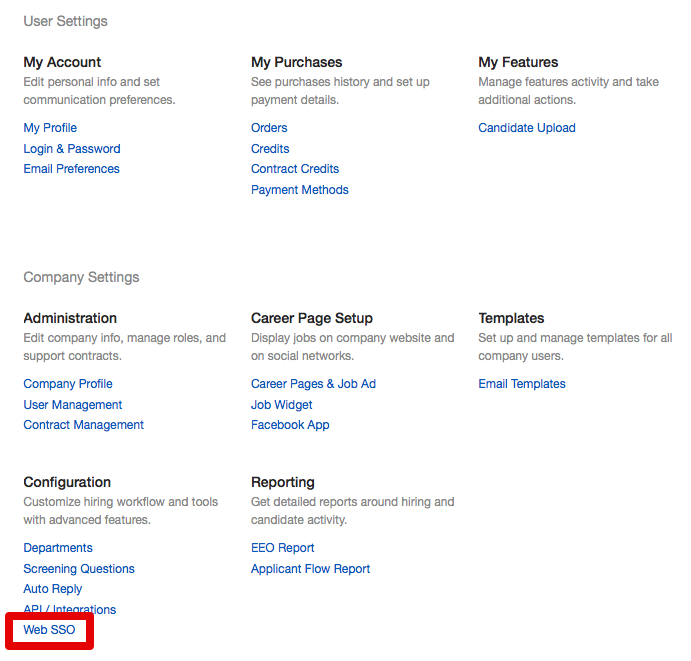
Go to Settings -> Admin -> Web SSO (if you are already logged in you can use this link). Please keep in mind that you must have a SmartRecruiters Admin user account in Corporate Plan to be able to see this page.
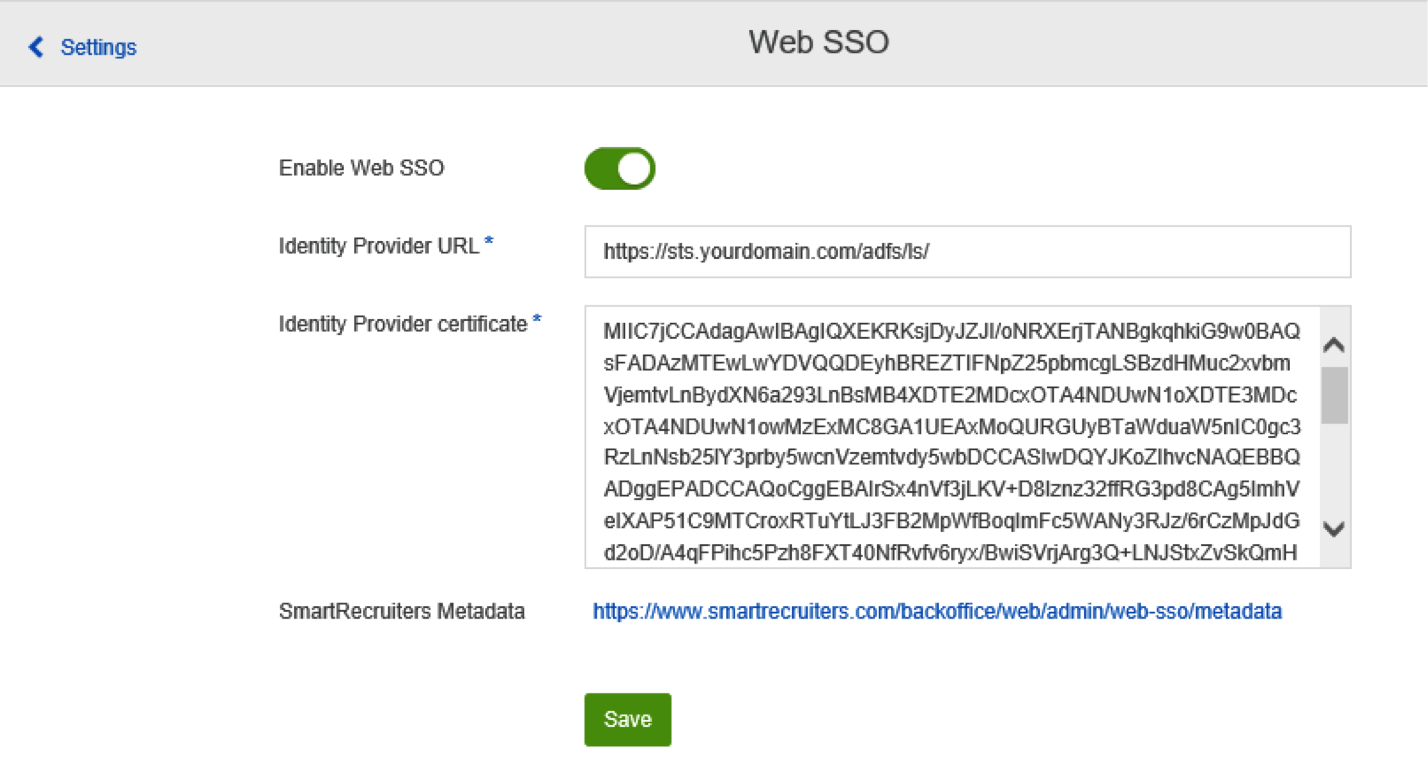
- Click on the Enable Web SSO toggle, and click on Save.

- Copy IdP URL and Certificate from your IdP metadata (FederationMetadata.xml). You can find your ADFS Federation Metadata file URL on the AD FS server through the ADFS Management in ADFS > Service > Endpoints > Metadata. It should look like this:
https://sts.yourdomain.com/FederationMetadata/2007-06/FederationMetadata.xmlIf you can’t open the metadata URL link in Internet Explorer, try using another browser. When you open the XML file, you will find your Idp URL and Certificate inside, similar to the example below.
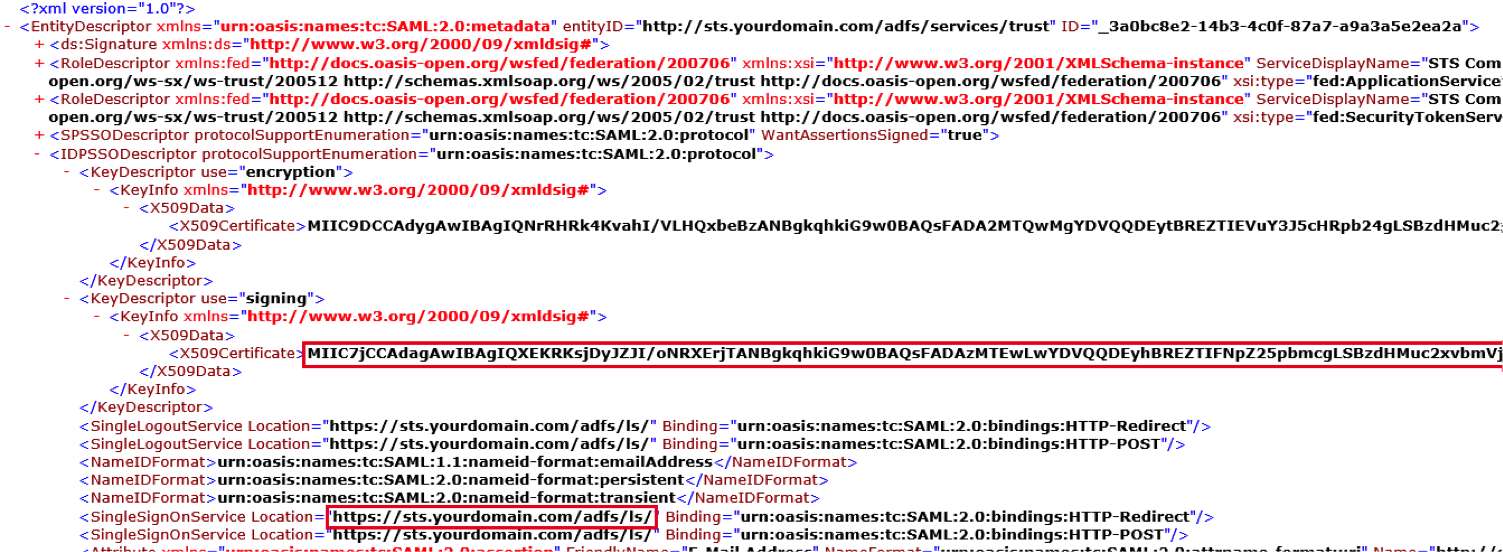
- Paste the IdP URL and Certificate in the SmartRecruiters Web SSO settings as shown in the example below. Click on Save.
Part 2: ADFS Configuration
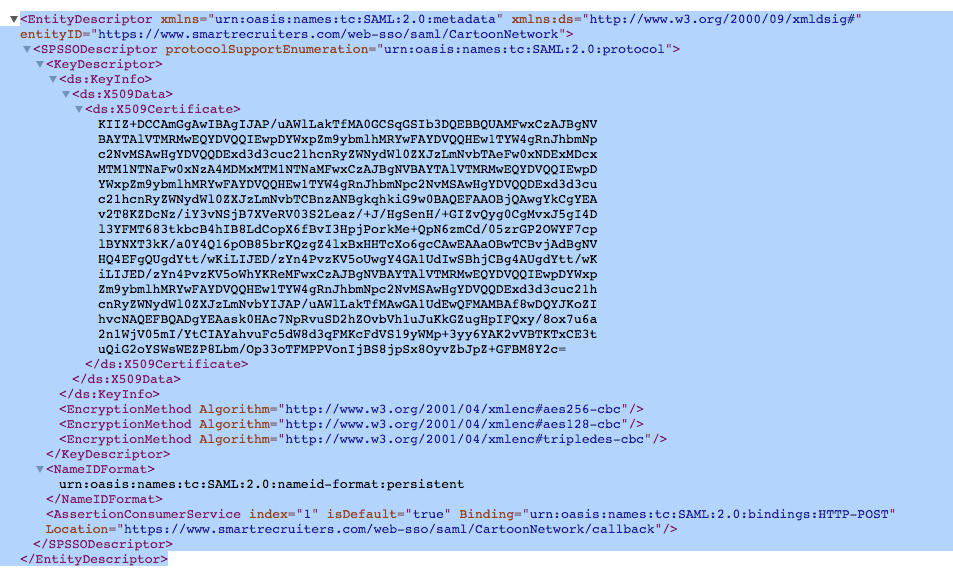
- Open SmartRecruiters Web SSO metadata from the Web SSO configuration page and save it as an XML file (for example,
metadata.xml) to your local hard drive.
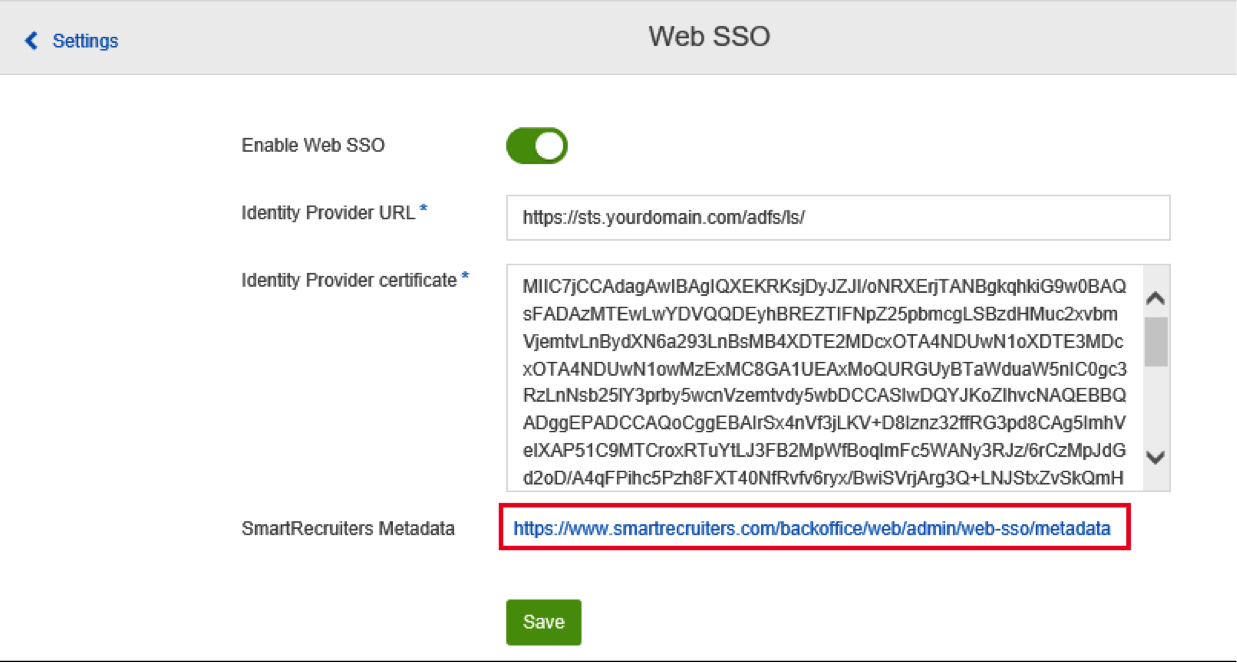
Make sure that you have this file available locally on your AD FS server – copy it to the drive of the ADFS server if it was downloaded on your local drive.
- Run AD FS Management on the ADFS server.
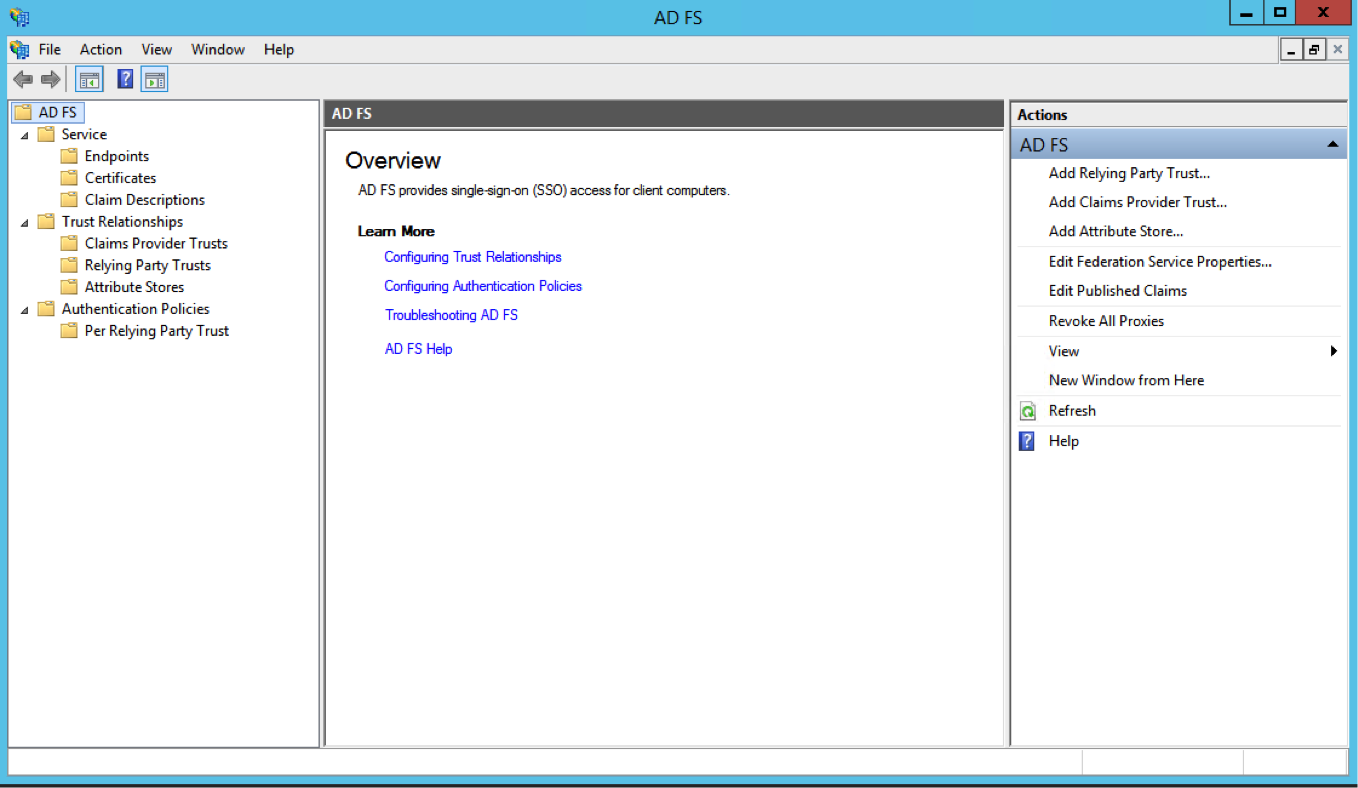
- Go to AD FS > Trust Relationships, right-click on Relying Party Trusts, and select Add Relying Party Trust… The Wizard window will appear:
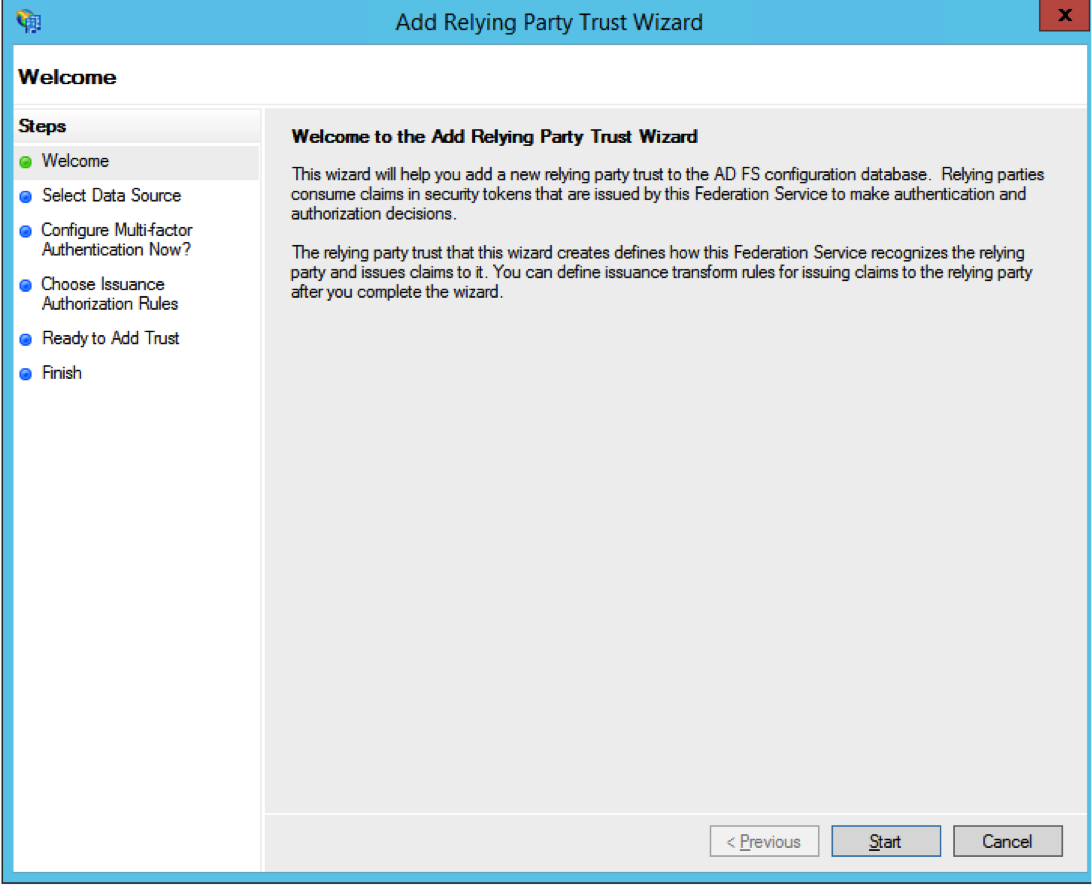
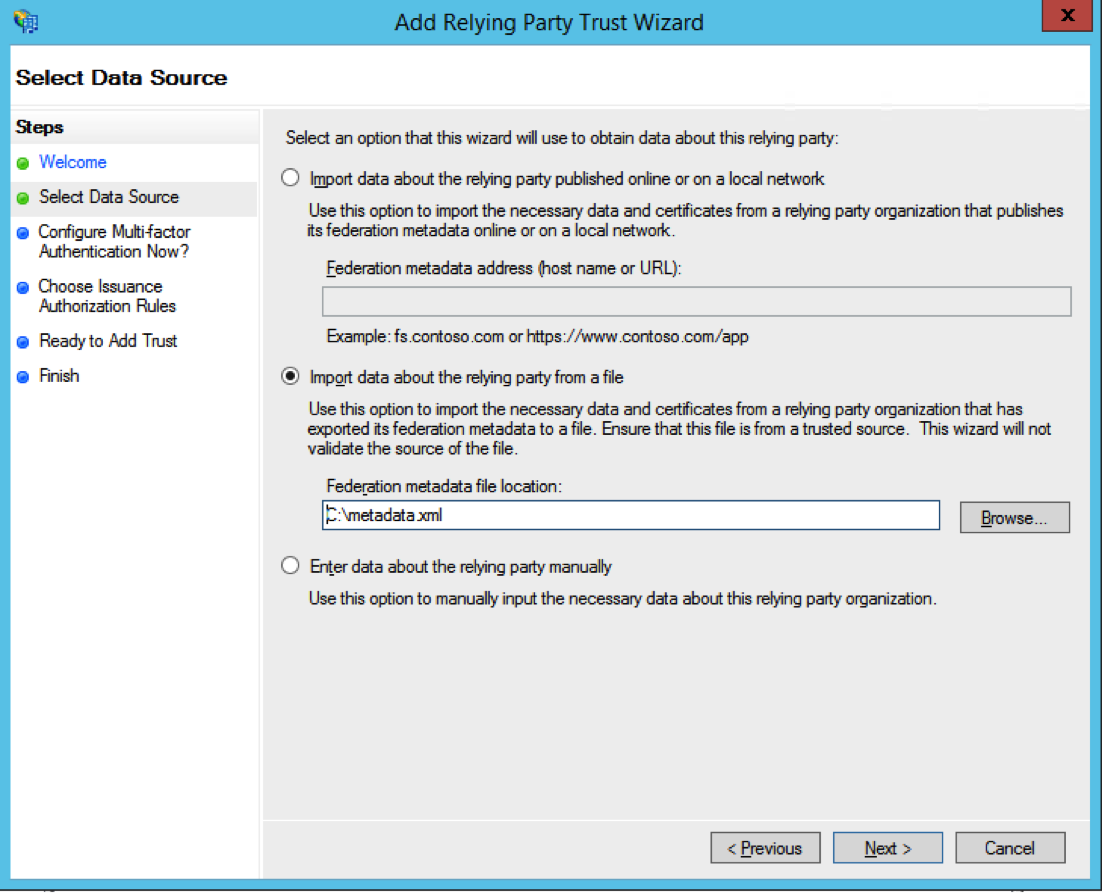
- Click on Start and then select Import data about the relying party from a file. Click Browse and go to the metadata.xml file that you got in Step 1. Click on Next.
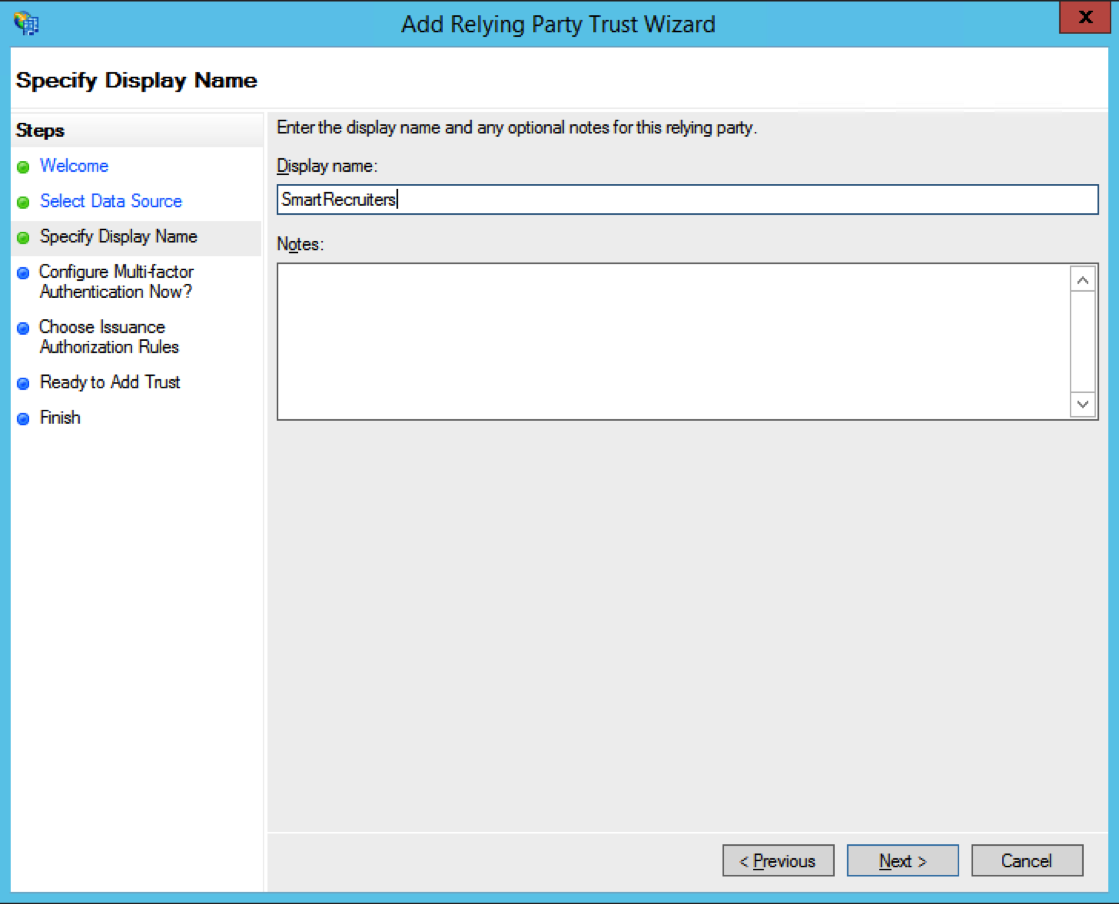
- Enter the Display name (for example “SmartRecruiters”) and click on Next.
-
On the Configure Multi-factor Authentication Now? click on Next.
-
On the Choose Issuance Authorization Rules click on Next.
-
On the Ready to Add Trust click on Next and then on Finish.
-
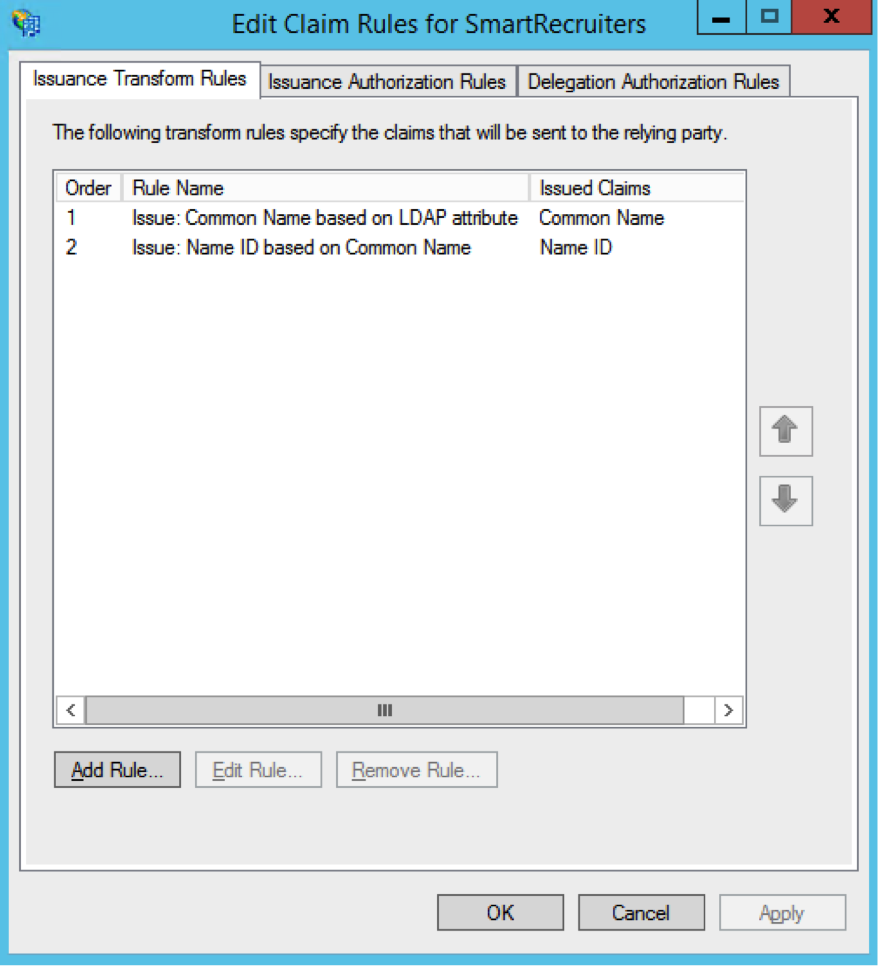
Right-click on SmartRecruiters (or on the other Display name that you defined in Step 5) and select Edit Claim Rules… Click on Add Rule…
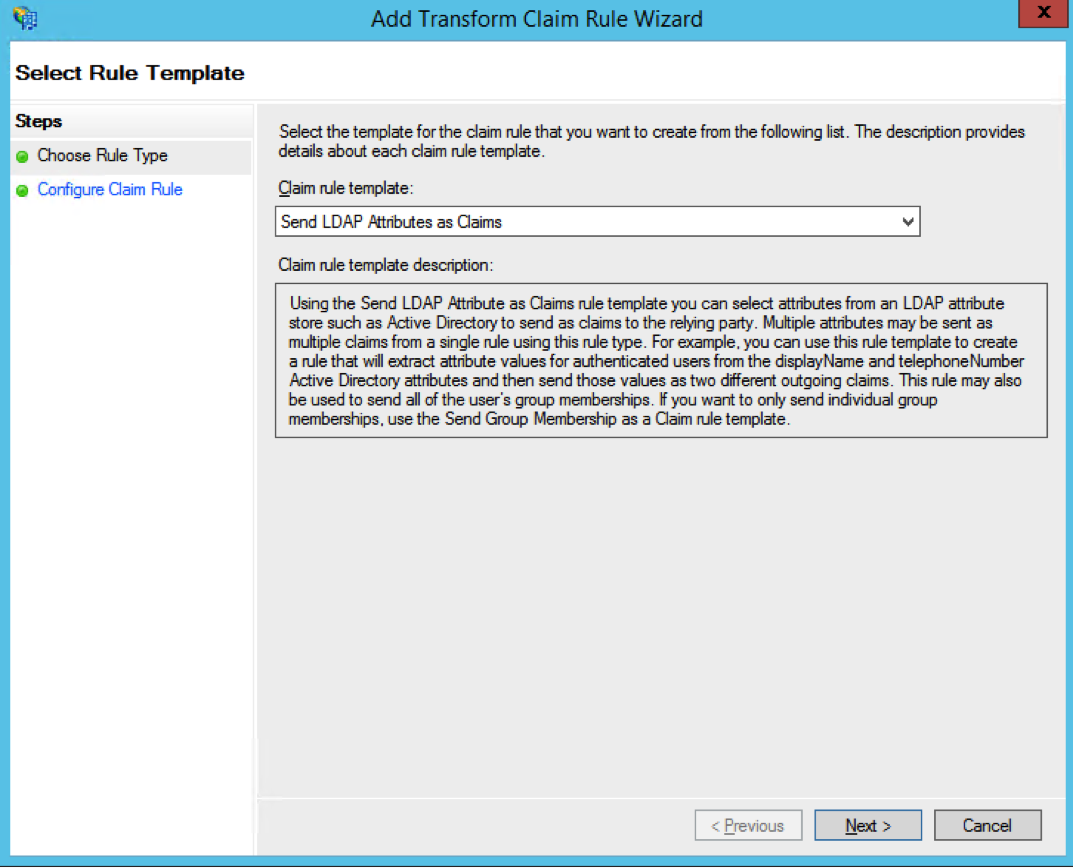
- In the Claim rule template select Send LDAP Attributes as Claims and click on Next.
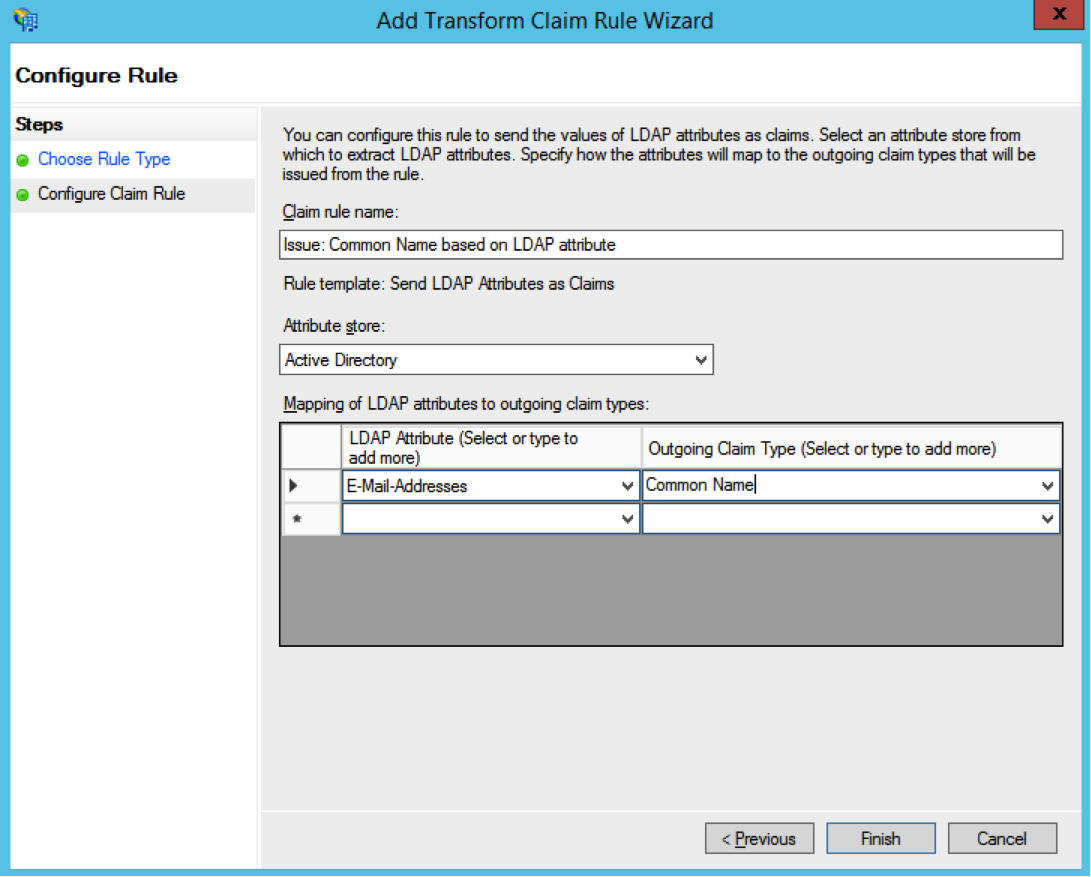
- Enter the Claim rule name (for example “Issue: Common Name based on LDAP attribute”). In the Attribute store select Active Directory. As the LDAP Attribute enter the name of the Active Directory attribute which contains the
ssoIdenfiervalue that will match the SmartRecruiters user account ssoIdentifier (it should be the user’s email address; case sensitive). As the Outgoing Claim Type select Common name. Click on Finish.
You can read more about the ssoIdentifier in the User Binding section of the Web SSO Overview guide.
-
Right-click on SmartRecruiters (or the other chosen Display Name) again and select Edit Claim Rules… Click on Add Rule…
-
In the Claim rule template select Transform an Incoming Claim and click on Next
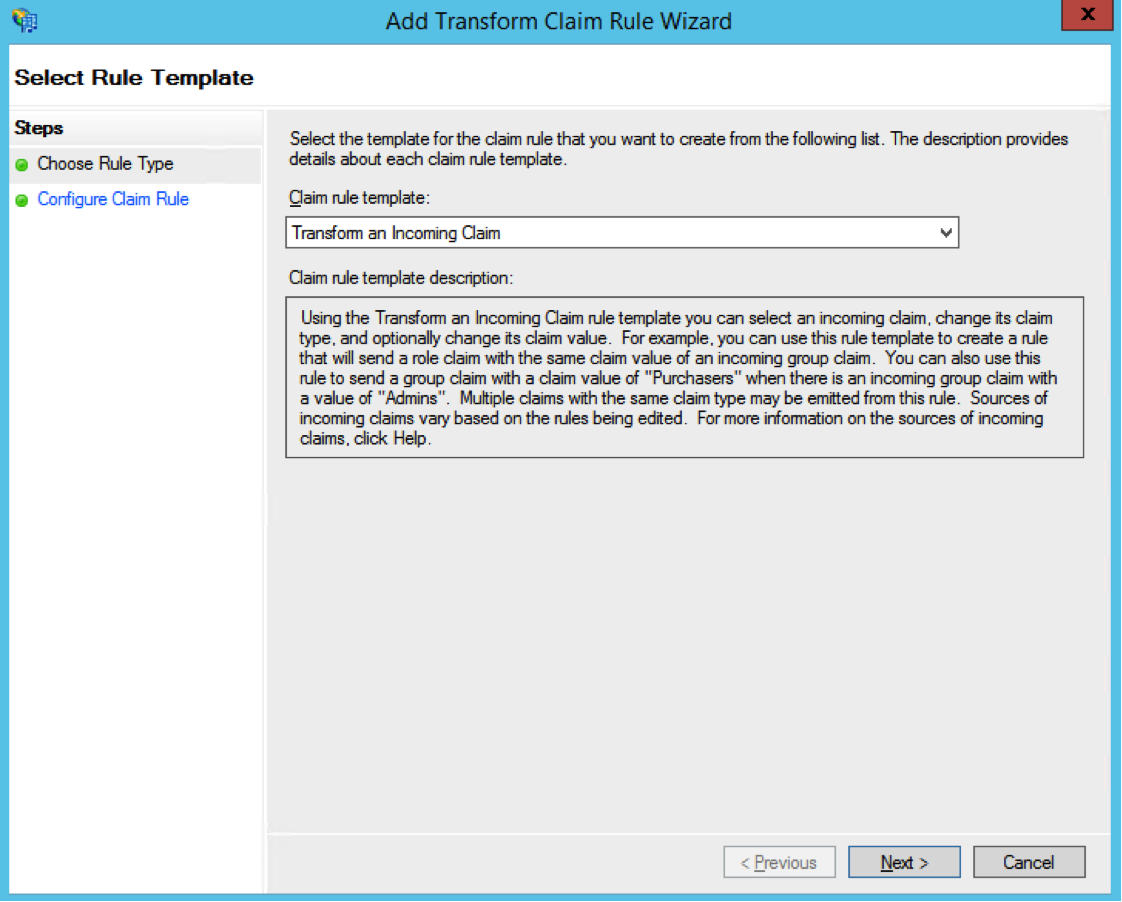
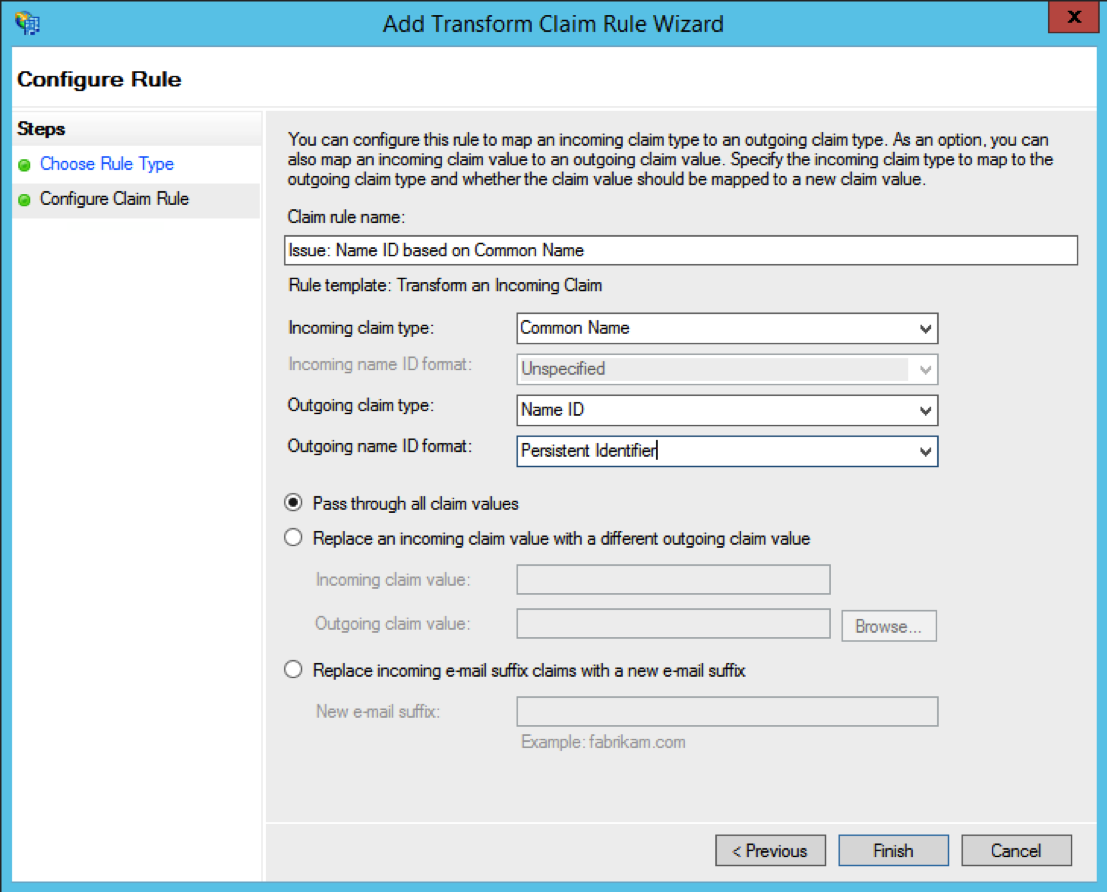
- Enter the Claim rule name type (for example “Issue: Name ID based on Common Name”). In the Incoming claim type select Common Name. In the Outgoing claim type select Name ID. In the Outgoing name ID format select Persistent Identifier. Click on Finish and then on OK.
- That’s it! 🎉 Your ADFS is set to work with SmartRecruiters Web SSO now. In order to test it and initiate the Web SSO login process, please use the URL following the example below:
https://www.smartrecruiters.com/web-sso/saml/`<CompanyIdentifier>`/loginWhere the <CompanyIdentifier> will be the value of your company identifier.
Please note that users need to be provisioned in SmartRecruiters for this to work correctly. You can read more about it in the User Provisioning section of the Web SSO Overview guide.
Updated 3 months ago