Configuration
Prerequisites
In order to perform a full Web SSO setup with SmartRecruiters we assume the following:
- You have an Identity Provider (IdP) set up and running and you’re familiar with adding a new Service Provider (SP) to its configuration
- You have all the capabilities to integrate your IdP with our User API in order to sync user profile details on an ongoing basis (e.g. remove from SmartRecruiters terminated employees’ profiles)
- You have an Admin account within SmartRecruiters to access Web SSO configuration
Create user profiles within SmartRecruiters
In order to properly set up User profiles within SmartRecruiters, build an integration with your IdP (to manage user profiles from a single location), and provide a seamless experience for IdP users, please use our User API. You can find detailed instructions on how to do it in our Creating new SSO-enabled user guide.
If you wish your IdP users to be automatically logged in to SmartRecruiters the very first time, please ensure you do the following:
- Provide a
ssoIdentifierwhen creating user profiles via the User API; this identifier will be used for SAML assertion (persistentoremailAddressiIdentifier needs to be used, as per sections 8.3.2 and 8.3.7 of the official SAML 2.0 documentation). You can find more details about that on the Web Single Sign-On Overview page - Activate users using the dedicated User API endpoint
Note: An email address and password which you provide for each user while creating their profiles can be used to log in directly to SmartRecruiters without a need of going through an IdP.
Specific IdP guides
Below you can find detailed guides on how to configure SmartRecruiters as a Service Provider in specific IdP applications. If the guide to a specific IdP that you are using is not listed below and you know it exists (usually it’s available on IdP help pages), feel free to send it to us and we will be happy to add it here.
- AD Federation Service Configuration Guide
- Google Apps – you can get the Entity ID, Single Sign-On URL, and X.509 Certificate values by logging in to SmartRecruiters as an Admin, going to Settings/Admin -> Web SSO and clicking Download SmartRecruiters Metadata (here's the direct link if you are already logged in). It is shown in point 3 of “Add new Service Provider in your IdP” part of the generic guide below. Here’s our logo that you can use as an icon for the SmartRecruiters app.
- Okta – your Identity Provider URL and Identity Provider Certificate will be generated in the linked guide when you sign into your Okta Admin Dashboard
Generic IdP guide
Each IdP configuration looks different in detail but the general concept remains the same as we deal with the SAML 2.0 standard. Therefore we present below an example of how to add a new Service Provider using a free OpenIdP provider. Please note, that the OpenIdP service is no longer available and has been shut down, however, the guide below is still valid for getting a generic setup flow.
Web SSO configuration in SmartRecruiters
In order to perform a Web SSO configuration in SmartRecruiters you need to be an Admin user.
- Open the Web SSO configuration page directly or log in to SmartRecruiters and go to Settings / Admin -> Web SSO

- Enable Web SSO

- Configure SmartRecruiters Signature Algorithm and Certificate.
Please select a certificate with the longest validity.

- Copy IdP URL and Certificate from your IdP metadata

- Paste the IdP URL and certificate into the corresponding fields. The Identity Provider certificate field requires the full PEM certificate block, copied from your SSO provider configuration. Make sure to include both the header and footer lines:
-----BEGIN CERTIFICATE-----
...
-----END CERTIFICATE-----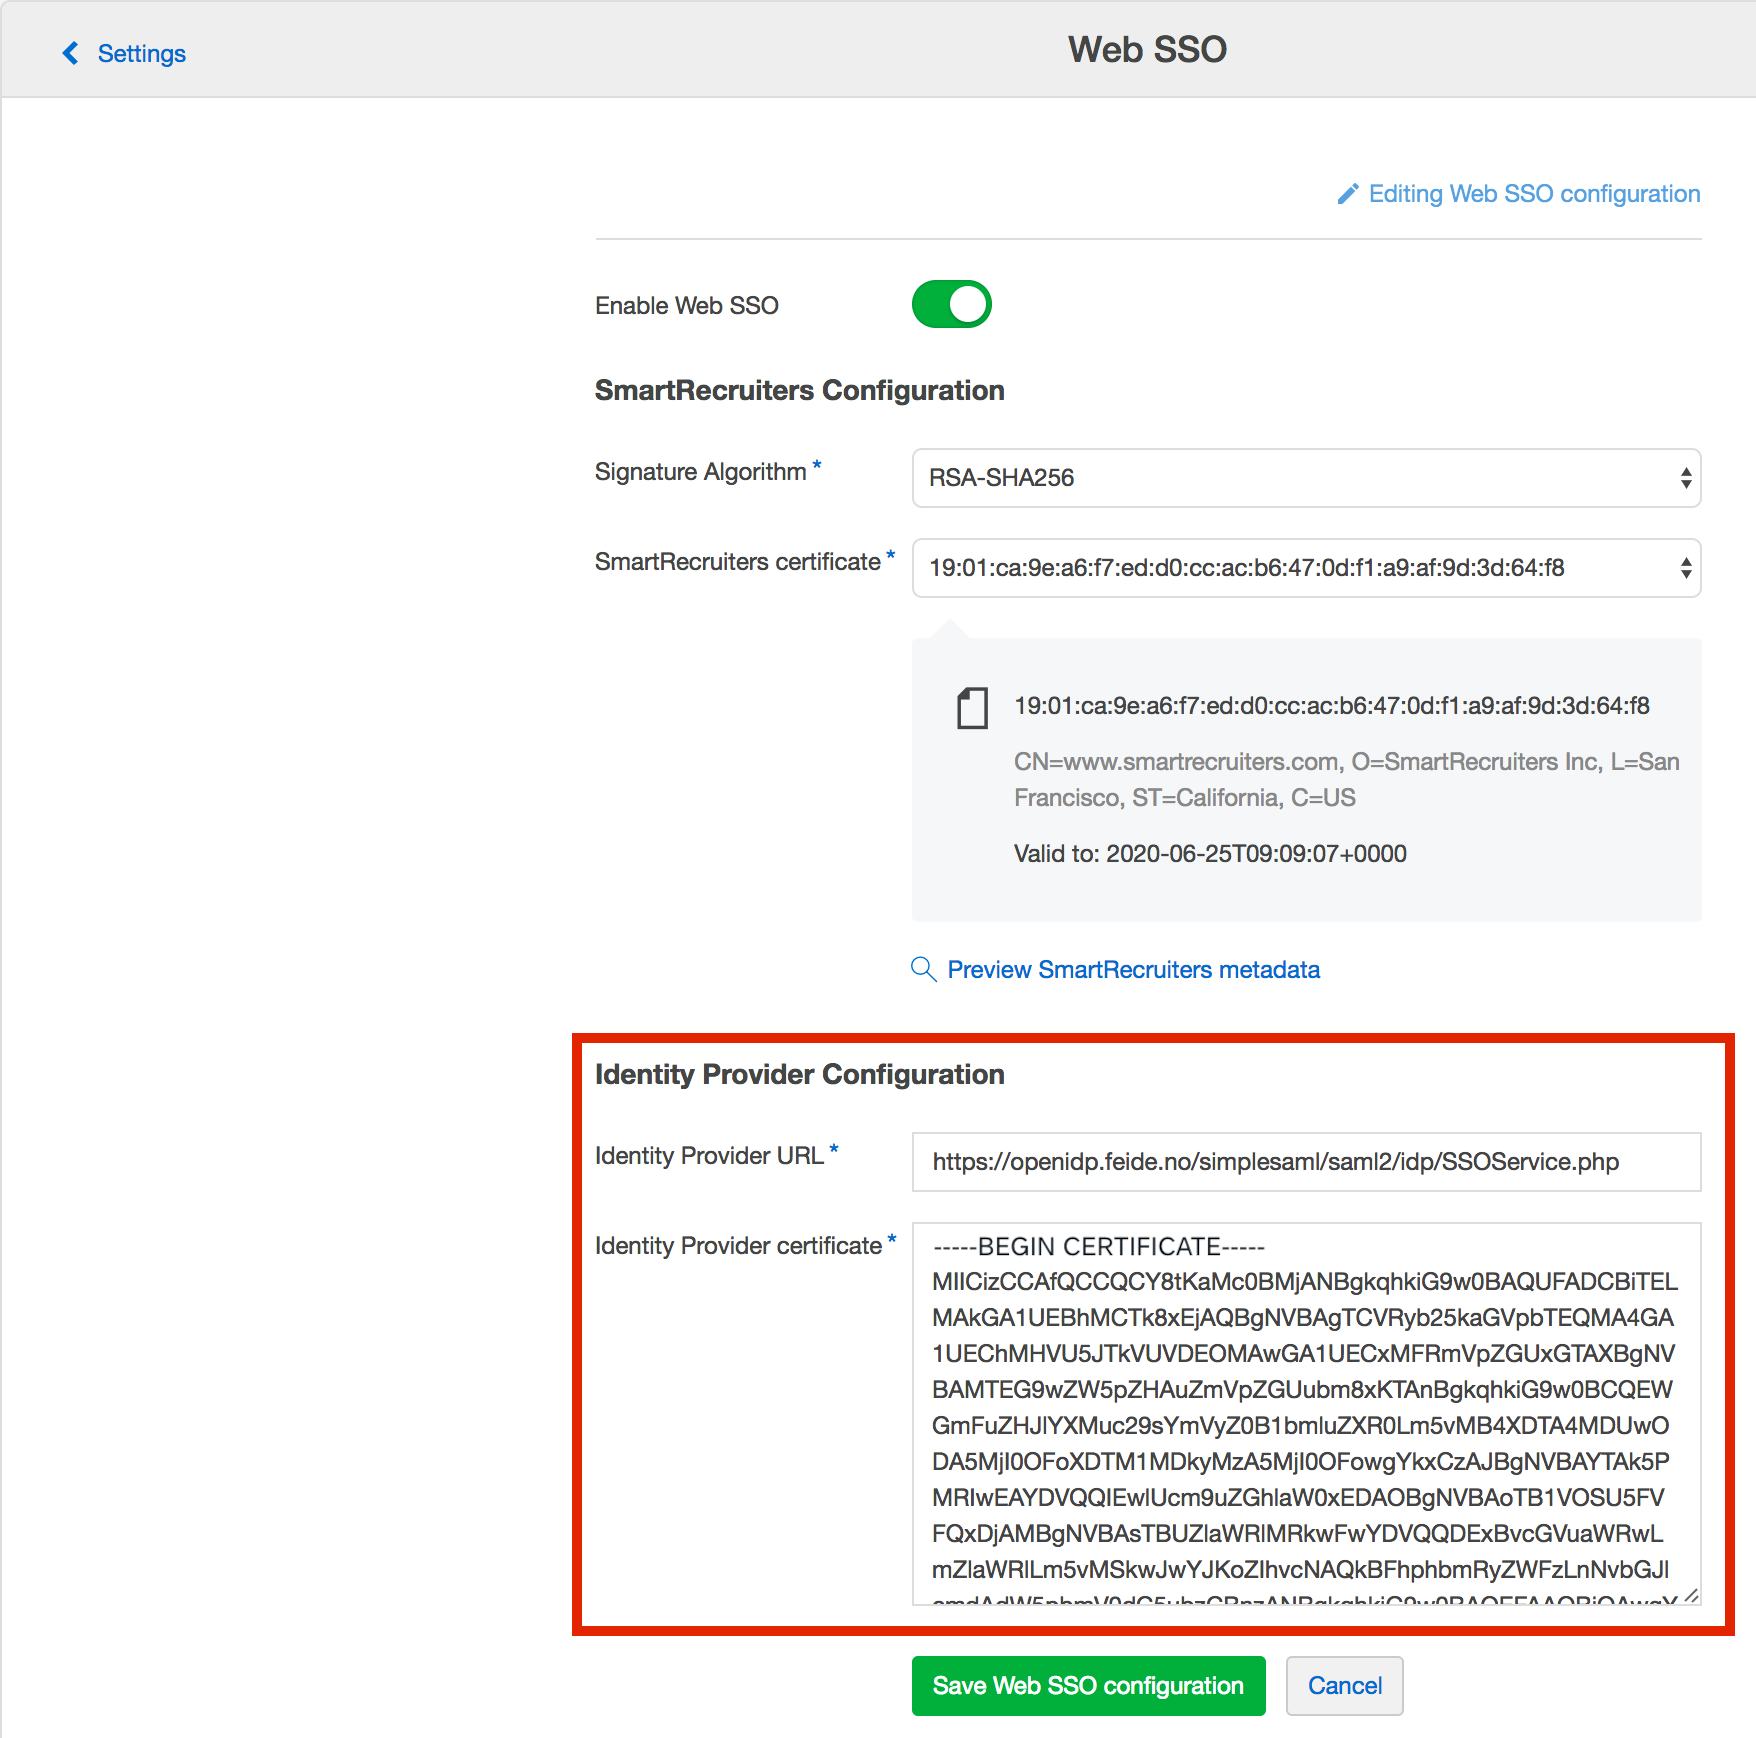
Security Settings
- Require signed assertions - When enabled, SmartRecruiters will reject any login attempt where the SAML assertion itself is not digitally signed. Your IdP must sign the assertion, not just the response. Disabled by default.
- Enable strict replay attack protection - When enabled, SmartRecruiters verifies that each login response matches a specific preceding SAML request, preventing replay attacks. IdP-initiated logins will break if enabled. Disabled by default.
- Save Web SSO configuration
Adding a new Service Provider to your IdP
- Manage Service Providers

- Add a new Service Provider from SAML 2.0 XML metadata

- Open SmartRecruiters Web SSO metadata from the Web SSO configuration page and copy


- Paste the metadata in IdP configuration and Import

- Provide a Service Provider name and Save.

That’s all! In order to initiate the SSO login process please use the below URL:
https://www.smartrecruiters.com/web-sso/saml/<CompanyIdentifier>/loginUpdated 2 months ago