Updating ssoIdentifier
Follow those steps when you want to change the ssoIdentifier of a SmartRecruiters user
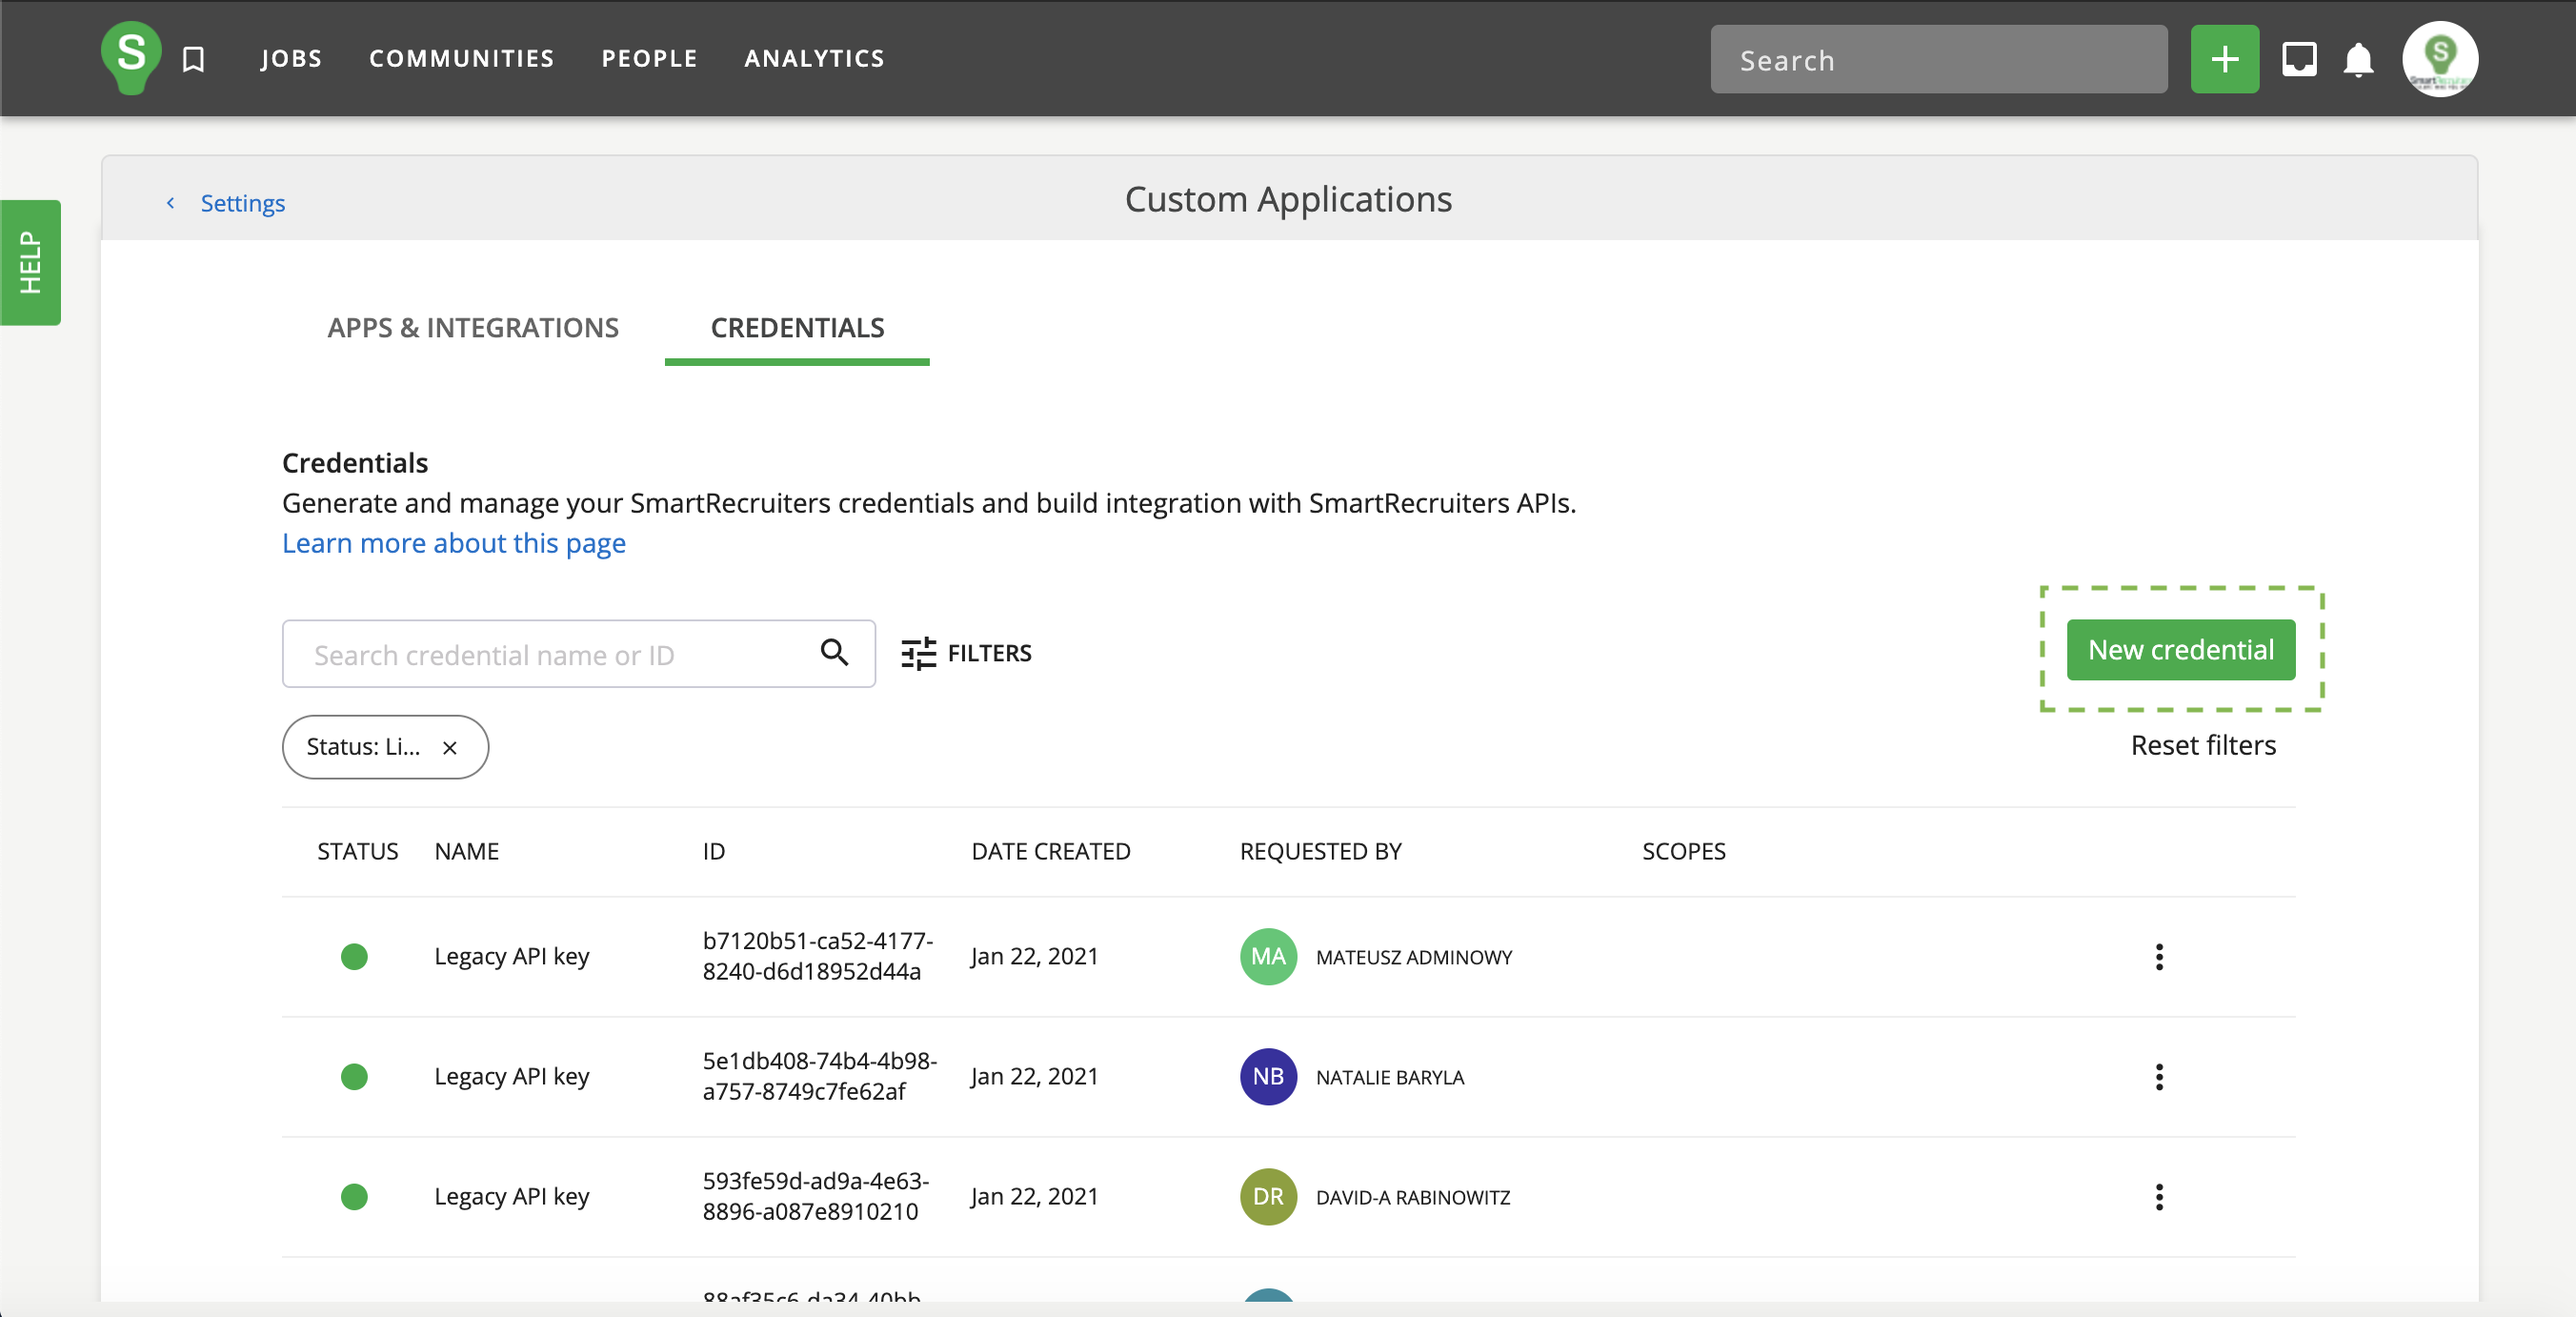
- To get your SmartRecruiters API key, please log in to your SmartRecruiters account, and go to Settings/Admin -> Apps & Integrations -> Credentials (if you are already logged in you can use this direct link). Please keep in mind that you have to have a SmartRecruiters Admin account in Corporate Plan to be able to see this page. Select New Credential to generate a new API credential; if you are creating an OAuth client ID, please ensure you specified users related access scopes.

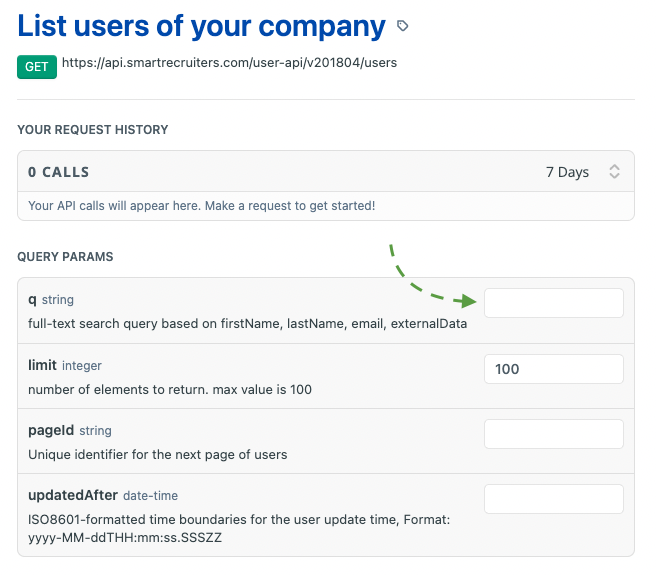
- Navigate to our Live Docs page and go to the GET /users endpoint. At the top of the page, in the X-SmartToken field please paste your SmartRecruiters API key that you got in step 1. Scroll down to the
GET /userendpoint, in the q field type the email address of the SmartRecruiters user that you want to changessoIdentifierfor. Click on the Try it! button. From the Response Body result, copy theidvalue of the user in question.

Please note that this classic API explorer doesn’t support the use of OAuth credentials. If you are using OAuth, use the new API explorer.
- Scroll down to the
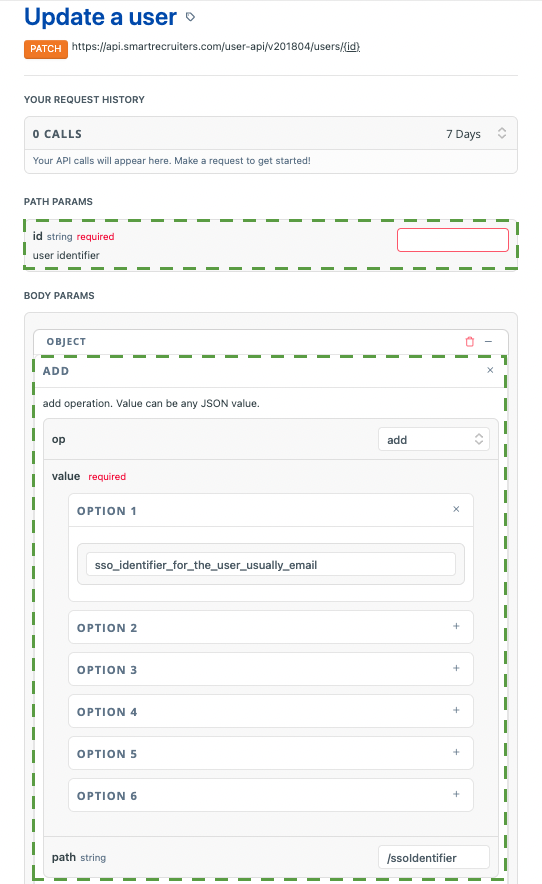
PATCH /users/{id}endpoint or use this link. Make sure that theX-SmartTokenis still in place at the top of the page. In the id field please paste the user’s id value that you got in step 2 of this guide. In the JSONPatch field please provide the following code:
[
  {
    "op":"add",
    "path":"/ssoIdentifier",
    "value":"sso_identifier_for_the_user_usually_email"
  }
]
where the sso_identifier_for_the_user_usually_email will be the new ssoIdentifier for the user in question (that is usually this person’s email indeed). Click on the Try it! button.

If the PATCH is performed correctly, in Response Body you should see a user object that has been updated. This means that the ssoIdentifier for the user has been successfully changed.
Updated 3 months ago